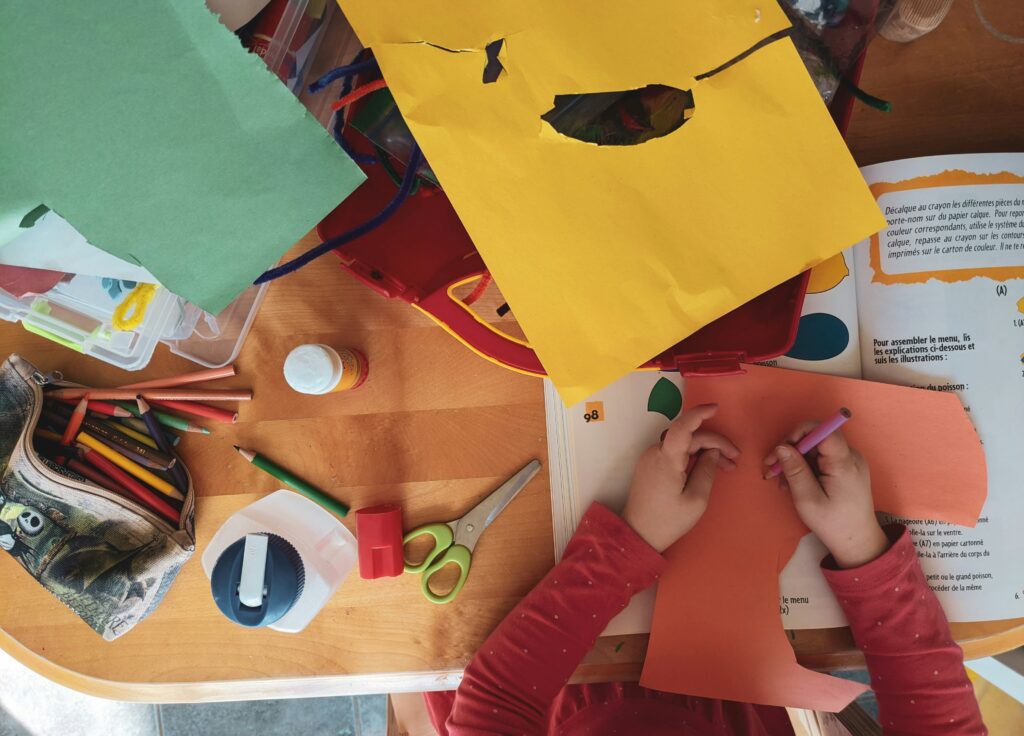
Drawing to Pendant Tutorial
This is a weekly edition of Make It Monday – hope you enjoy!
Drawing to Pendant Tutorial Material
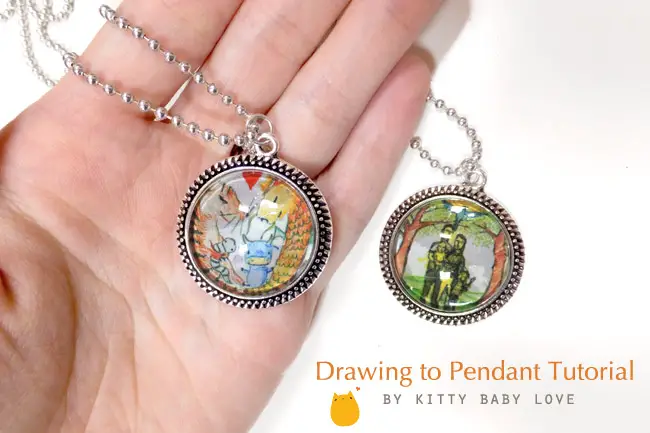
MATERIALS
blank pendant (amazon affiliate link… the one I have is an “antique” 1″ round pendant)
half dome glass covering to encase your pendant (optional)
ball chain for your necklace
super glue
1″ hole puncher
sticker paper
round bowl
drawing supplies
INSTRUCTIONS
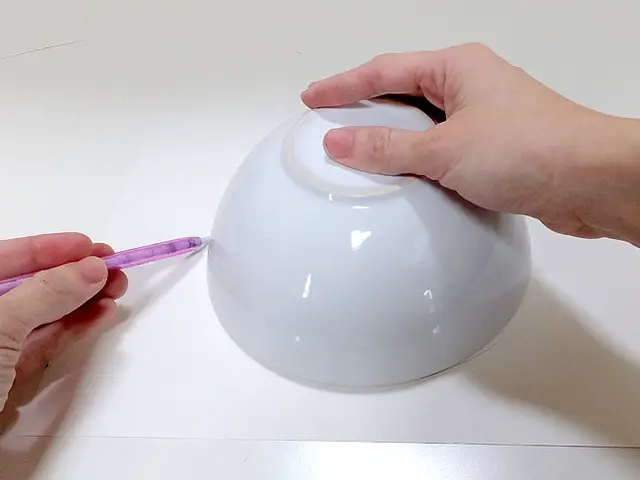
Drawing to Pendant Tutorial 01
Drawing in a 1″ circle is optional but to make this accessible, we drew it large and then shrunk it down in the computer. Use an upside down bowl to trace a circle. This will be your drawing template.
Drawing to Pendant Tutorial 02
Drawing to Pendant Tutorial 02 a
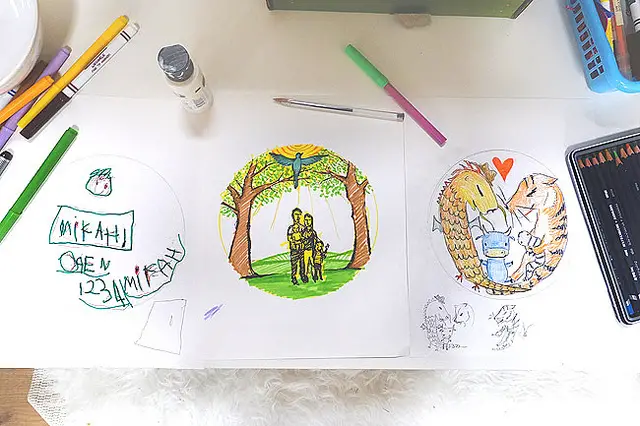
Draw away! Mikah, Ben, and I all did one. Mikah likes writing and drawing in pen- he rarely ever uses colors. He did a happy face and wrote “MIKAH!” “OPEN” “1234″ “MIKAH.”
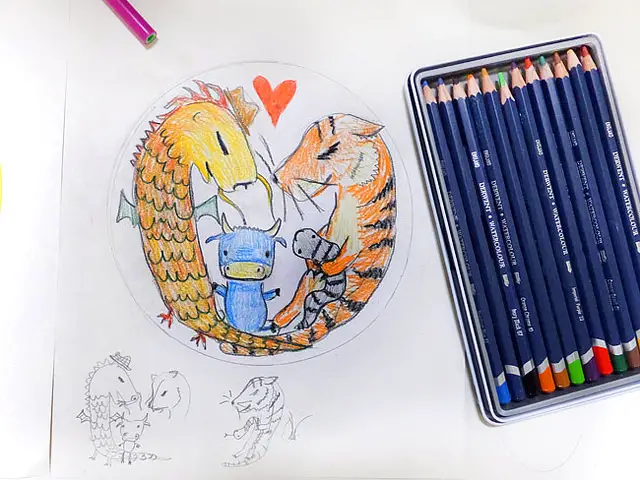
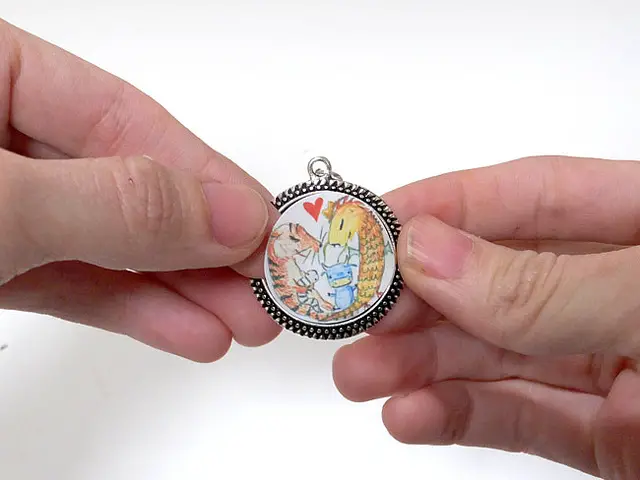
Ben and I did family portraits. His is in markers and pens. I did mine in watercolor pencils and drew us as our Chinese astrology animals. Ben is a dragon (1976), I am a tiger (1986), Mikah is an ox (2009), and Noah is a snake (2013).
Drawing to Pendant Tutorial 03
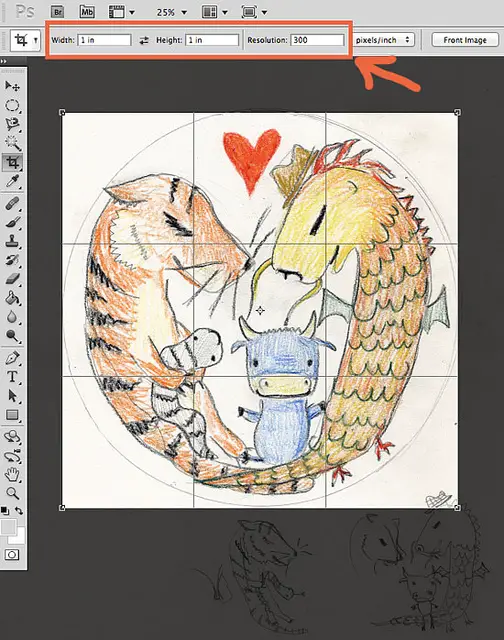
Scan into the computer at 300dpi and work some photo editing magic! If you are curious about photo editing in Photoshop, feel free to ask and I can do a full tutorial on it. For the sake of this tutorial the most important thing to know is cropping.
Select the crop tool. At the top adjust the size to “1 in” by “1 in” and “300″ pixels/in. This will ensure your drawing prints at the right size.
Drawing to Pendant Tutorial 04
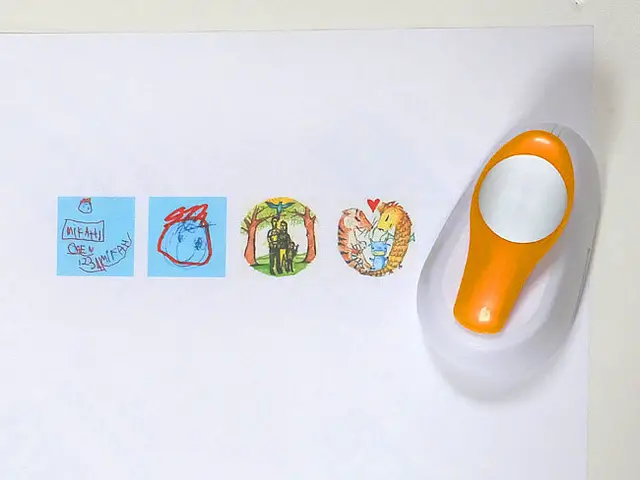
Print your cropped image at 100% and in as high printing quality as possible (sometimes called photo paper).
I printed mine on sticker paper, available in any office store. Mikah’s entire image printed super tiny so I made made him an option of having just the happy face and edited the colors in his favorite colorway- he ended up really liking it and picked the blown up happy face.

Drawing to Pendant Tutorial 05
Use your 1″ hole punch to get the perfect size punched out.
Drawing to Pendant Tutorial 06
Peel the sticker off and align it on your pendant.

Drawing to Pendant Tutorial 07
I used super glue to stick the glass dome on top of the image. I noticed that it made the paper slightly darker where it soaked into the paper.
In the future I’ll try another glue- please let me know if you have a better alternative!

Drawing to Pendant Tutorial 08
…and done! You can string in your ball and chain necklace for a casual look or buy a higher quality chain to dress it up.

Drawing to Pendant Tutorial Pictures
Please tag me @kittybabylove or comment below with your project- i’d love to see it!